 Itemlume
DIAGNOSTIC GUIDE / Product images
Why can I still see the old background through my glass product after a cutout?
Because a cutout usually separates the silhouette from the background, not every light path through transparent glass. The old set may remain in transmitted or refracted areas inside the bottle, while edges and labels may have different failures. Inspect those regions separately; do not make the whole bottle opaque to hide the problem.
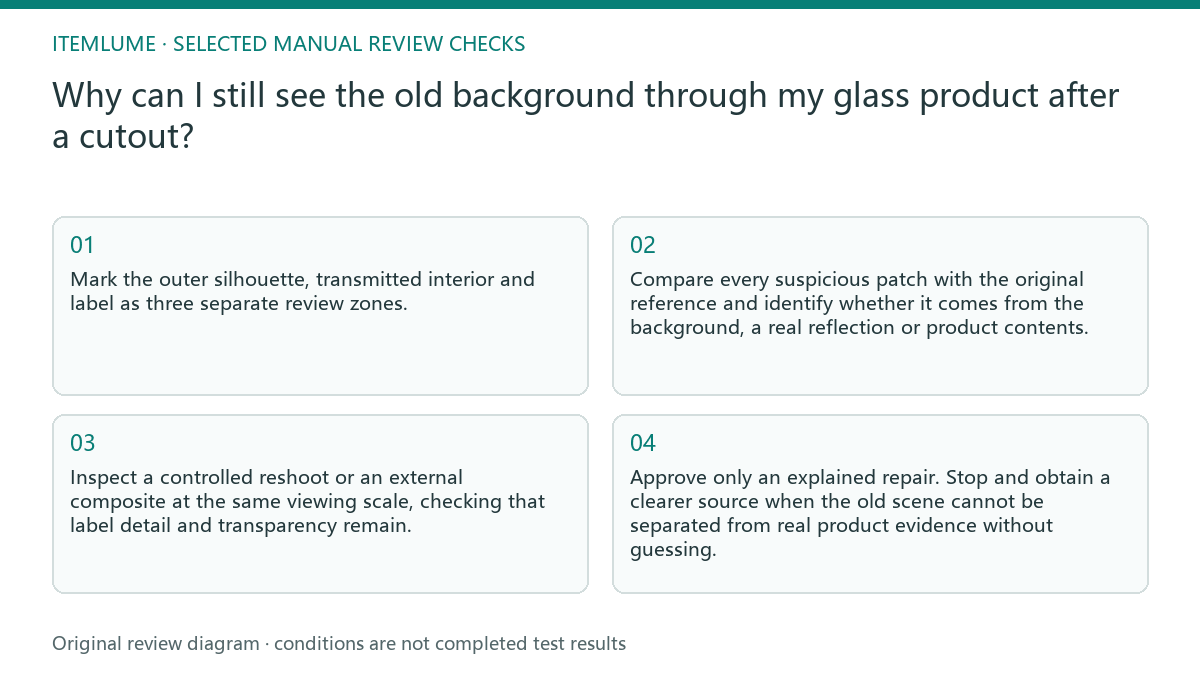
Diagnose the three different faults
Start by splitting the image into three inspection zones: outside the glass outline, inside the bottle, and the label or printed area. A halo, floor line, or prop beyond the silhouette is an outer-background failure. A dark stripe, window shape, or coloured patch visible through the bottle is an internal transmission or refraction issue. A label that changes wording, shape, or contrast is a product-reference issue, not simply a background-removal issue.
Glass does not behave like a flat opaque cutout. Its walls bend and reflect light, and the liquid, cap, label, and background can overlap visually. A clean outer contour therefore does not prove that the interior is clean. Compare the result with an approved product reference and check the readable label separately.
Use a controlled repair sequence
First, create the required failure diagram with three labels: outer background, bottle interior, and label. Mark the exact old-background shape instead of describing the whole image as “bad.”
Second, inspect the original photograph at the marked interior area. If the old shape is present in the source, a cutout alone cannot reliably remove it without changing the product’s optical evidence.
Third, test an external composite using a background chosen to match the intended scene. Keep the bottle’s genuine contour, highlights, liquid level, cap, and label visible; mask only the offending scene element.
Fourth, request a reshoot when the source does not contain enough clean glass evidence, the old background crosses important product details, or the composite would require inventing the bottle’s structure.
Fifth, approve only after checking the three zones at display size and enlarged size. Record which single change fixed the marked fault.
- Mark the outer silhouette, transmitted interior and label as three separate review zones.
- Compare every suspicious patch with the original reference and identify whether it comes from the background, a real reflection or product contents.
- Inspect a controlled reshoot or an external composite at the same viewing scale, checking that label detail and transparency remain.
- Approve only an explained repair. Stop and obtain a clearer source when the old scene cannot be separated from real product evidence without guessing.
Choose reshoot or external compositing
A reshoot is the better route when the interior contains large, ambiguous reflections or when the label and liquid cannot be distinguished from the old set. Ask the photographer to provide a controlled reference with the product fully prepared, a deliberate background, and lighting that preserves the real edges and surface evidence. Use the current account or category requirements of the intended store to confirm any image settings before publishing; do not assume a universal platform rule.
External compositing is reasonable when the product reference is strong and the old background is a local, identifiable patch. Editing and photography remain manual or external workflows. Itemlume text planning is free after sign-in, while chargeable images or video have separate quotes; neither fact turns an external retouching or store-publishing step into an Itemlume function. Keep the original and edited files together so the owner can review the change.
Fictional worked example and stopping rule
Fictional example: Mina, a fictional owner, has a fictional clear serum bottle photographed in front of a blue card. After the outer cutout, the bottle outline is clean, but a blue rectangle remains through the liquid behind the label. The exact failure is an internal transmitted-background patch, not an outer halo. Change one: the editor removes only that patch in an external composite while preserving the bottle edge, liquid line, cap, and label. The result is acceptable because the blue shape disappears without making the bottle opaque. Change two is not attempted; adding a second background change would make the diagnosis unclear.
The stopping rule is: stop editing when the three-zone diagram shows no identifiable old-background shape outside or through the product, the label still matches the approved reference, and the glass retains believable transparency and edges at the intended display size. If any condition fails after one targeted external repair, stop and request a controlled reshoot rather than repeatedly painting over the bottle.
Glass cutout triage table
| Observation | What to check | Approval condition |
|---|---|---|
| Halo, floor line, or prop outside the silhouette | Inspect the contour against a contrasting temporary background | No identifiable old scene element remains outside the glass outline |
| Blue, grey, or rectangular shape inside the bottle | Compare the marked area with the original photo and identify transmission or refraction | The patch is removed or explained by real product detail without flattening transparency |
| Label text or shape changes | Compare wording, logo placement, proportions, and contrast with the approved product reference | Label matches the approved reference; owner or supplier verifies authoritative records where needed |
| Bottle looks opaque after repair | Check highlights, liquid level, wall edges, and visible background paths | Transparency is retained and the repair does not hide product evidence |
Use this matrix as a manual review record and add your own real evidence. Its conditions are not completed test results.
Sources and further reading
Sources for this page were checked on . Platform rules can change; verify the current source before publishing. Prompt examples and workflow recommendations are Itemlume editorial guidance, not independently measured results.
Frequently asked questions
Can I simply remove all transparency?
No. That hides the diagnostic problem and can change how the product is represented. Repair the specific outer or internal background fault instead.
When should I reshoot the glass?
Reshoot when the source lacks clean evidence for the interior, the old background crosses important details, or a local composite cannot preserve the real structure.
Does a clean silhouette mean the image is finished?
No. Inspect the outer background, bottle interior, and label separately. A clean contour can coexist with a visible transmitted background.
BUILD FROM A PRODUCT YOU KNOW
Put this workflow into practice with your own product.
Explore the relevant tool first. AI copy and concept planning are free after sign-in. Image and video generation require available credits and the applicable account access.
Open Product images Check pricing and credits